Mac RustDesk setup instructions
Use the Mac installer script. It detects Intel vs Apple Silicon, downloads the proper DMG, installs RustDesk, applies the Help.VserV.online server config, and registers the Mac in the admin portal when possible.
What to download
You do not need to manually download the DMG. The script downloads the correct Intel or Apple Silicon DMG automatically.
Mac Installer Script Download hereSafari/Chrome usually saves it in your Downloads folder.
~/Downloads/RustDesk-help.vserv.online-macos-install.sh
RustDesk server and relay:
help.vserv.online
Step by step
1Download the Mac installer script
Click the button above. If the browser asks whether to keep/download the file, choose Keep or Allow.
RustDesk-help.vserv.online-macos-install.sh
It should be in Downloads.
2Open Terminal
Use either method:
- Press Command ⌘ + Space, type Terminal, then press Return.
- Or open Finder → Applications → Utilities → Terminal.
Look for the black/white terminal icon named Terminal.
3Run the installer
Copy and paste this command into Terminal, then press Return:
bash ~/Downloads/RustDesk-help.vserv.online-macos-install.sh
If macOS asks for your Mac password, type the password you use to log into the Mac and press Return. Terminal may not show dots while you type; that is normal.
bash ~/Downloads/RustDesk-help.vserv.online-macos-install.sh
This downloads the right DMG, installs RustDesk, and applies the Help.VserV.online config.
4Allow RustDesk to open if macOS blocks it
If you see a message that RustDesk cannot be opened or was blocked:
- Open the Apple menu in the top-left.
- Open System Settings.
- Go to Privacy & Security.
- Scroll down and click Open Anyway for RustDesk, if shown.
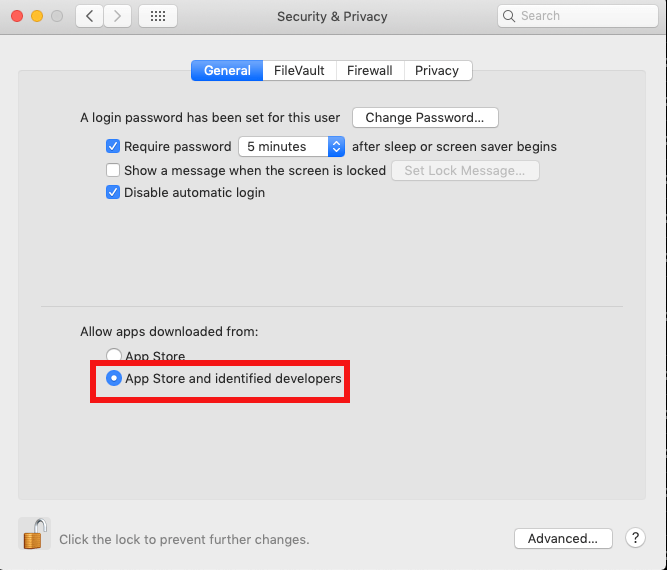
Screenshot shown in English — it reflects the real operating system interface, which stays in English regardless of page language.
5Grant Accessibility permission
This allows remote support to control the mouse and keyboard:
- Open Apple menu → System Settings.
- Click Privacy & Security.
- Click Accessibility.
- Turn on RustDesk. If RustDesk is missing, click + and choose Applications → RustDesk.
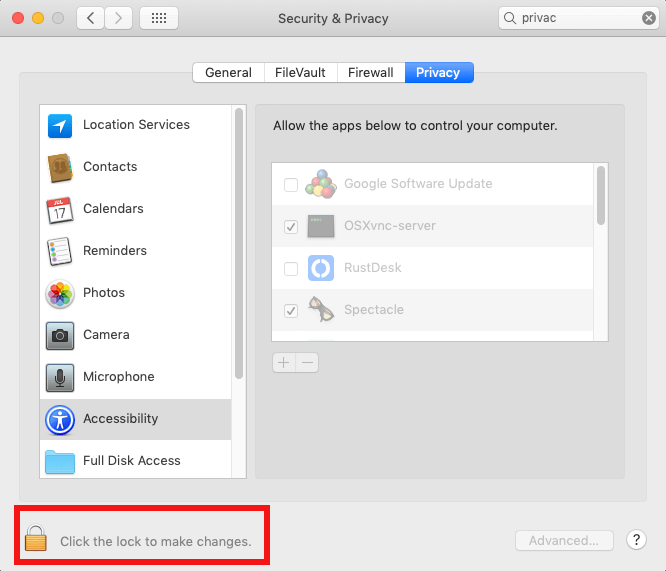
Screenshot shown in English — it reflects the real operating system interface, which stays in English regardless of page language.
6Grant Screen Recording permission
This allows the helper to see the Mac screen:
- Open Apple menu → System Settings.
- Click Privacy & Security.
- Click Screen Recording. On some macOS versions this may be called Screen & System Audio Recording.
- Turn on RustDesk. If asked, click Quit & Reopen.
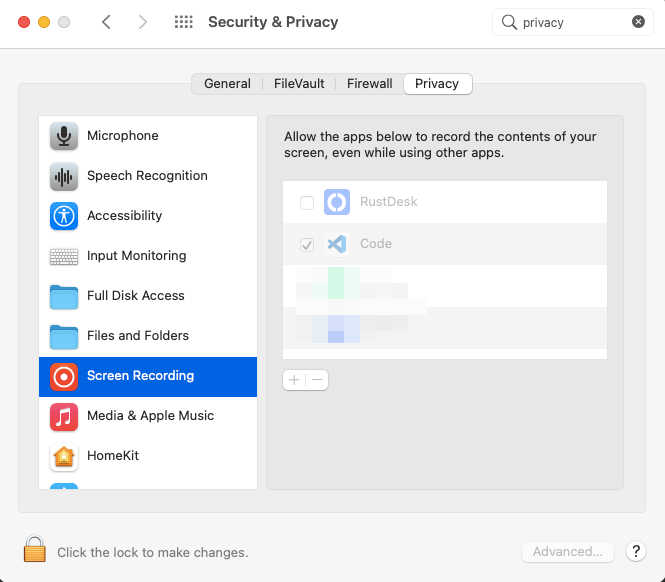
Screenshot shown in English — it reflects the real operating system interface, which stays in English regardless of page language.
7Grant Input Monitoring if macOS asks
Some Macs also ask for Input Monitoring. Use the same path:
Apple menu → System Settings → Privacy & Security → Input Monitoring → turn on RustDesk.
If RustDesk still warns, remove it from the list with the minus button, add it again with the plus button, then restart RustDesk or reboot the Mac.
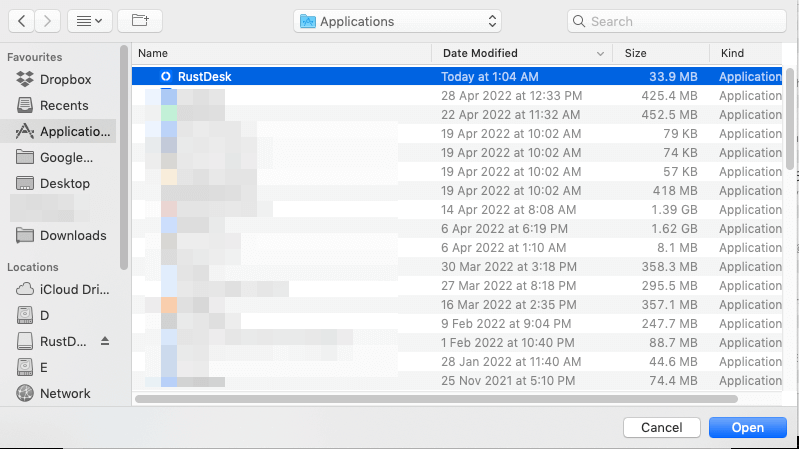
Screenshot shown in English — it reflects the real operating system interface, which stays in English regardless of page language.
8Confirm it is ready
RustDesk should open and show an ID on the left. Send that ID to Kaven/support if needed.
The script already configured help.vserv.online; you should not need to manually type the server settings.
RustDesk opens with a visible ID and status ready/online.